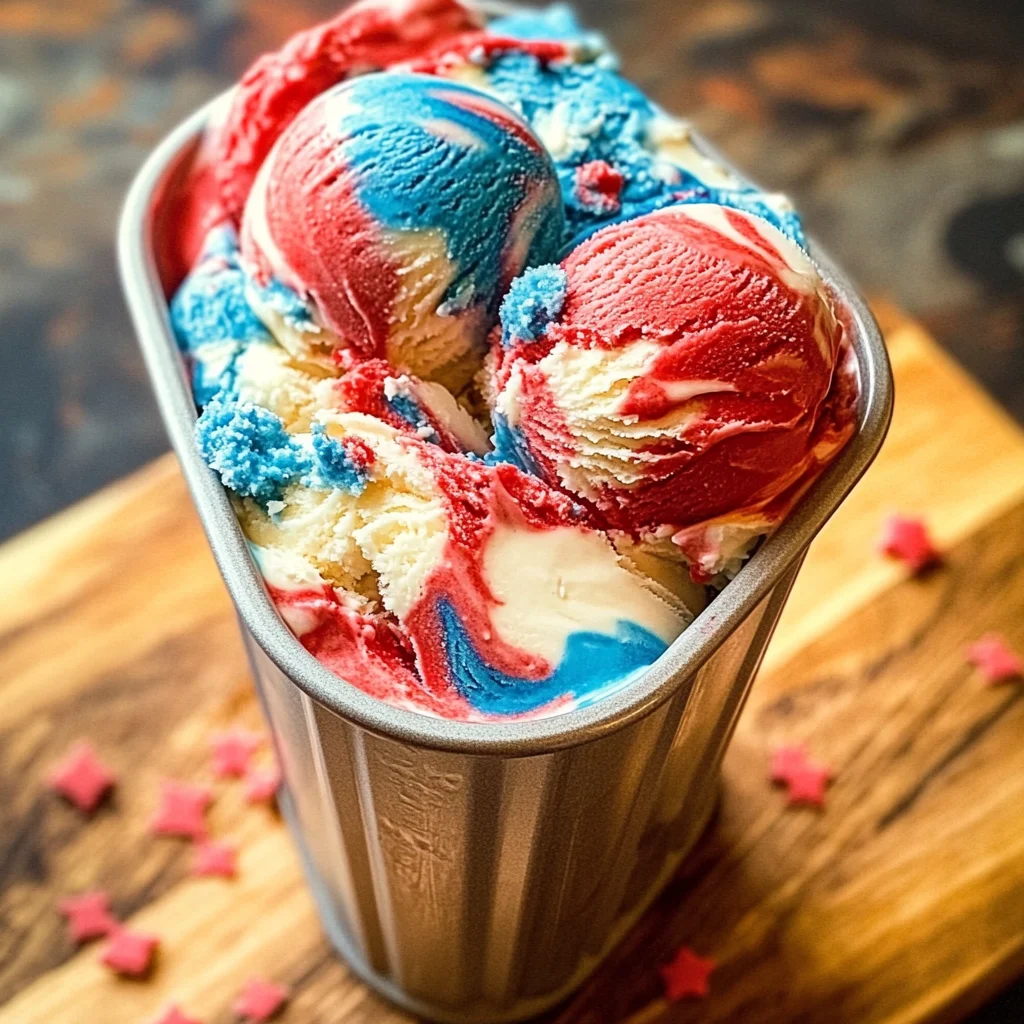
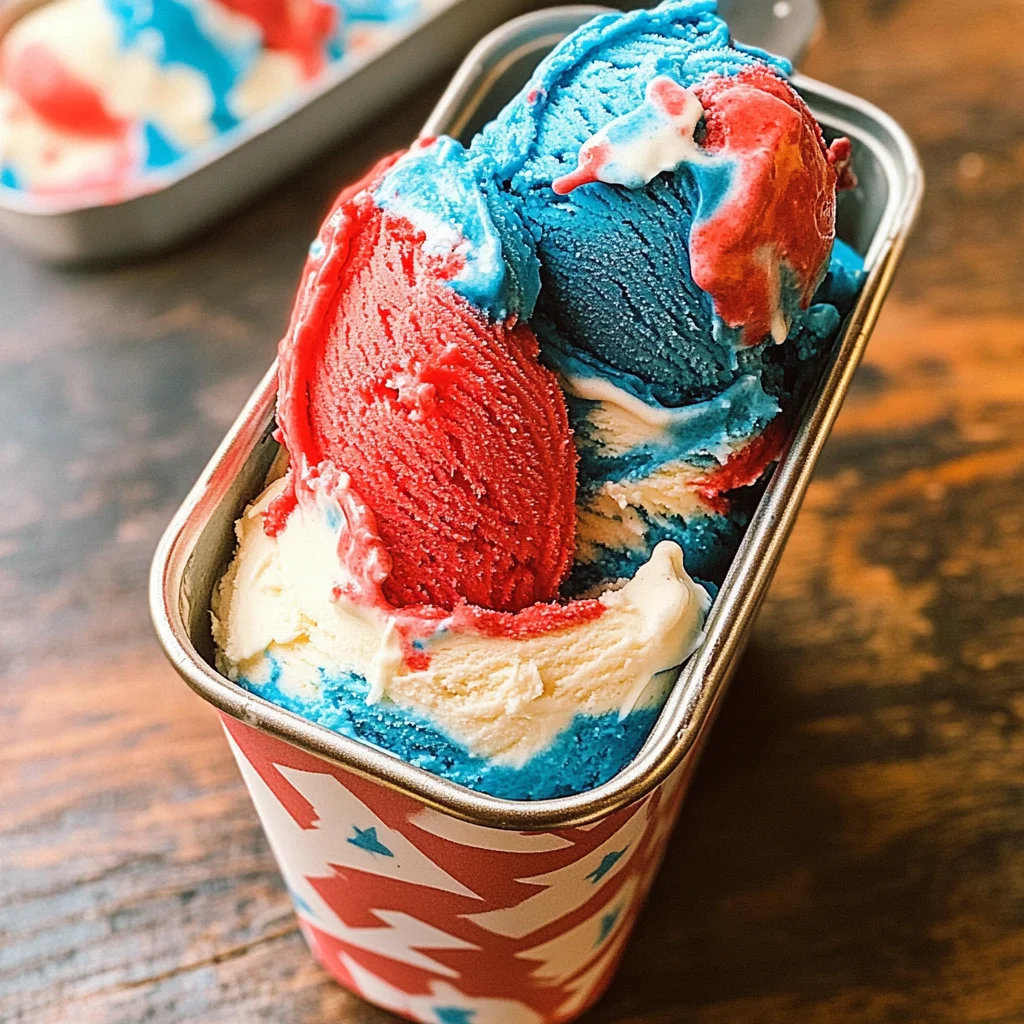
Red White and Blue Ice Cream is a delightful, no-churn dessert that combines the classic flavors of vanilla with a festive twist. This ice cream is perfect for summer celebrations, barbecues, and patriotic holidays like the Fourth of July. With its vibrant colors and creamy texture, it offers a refreshing treat that’s both fun to make and enjoyable to eat. Whether you’re hosting a party or simply looking to cool down on a hot day, this ice cream will surely impress guests of all ages.
Jump to:
- Why You’ll Love This Recipe
- Tools and Preparation
- Essential Tools and Equipment
- Importance of Each Tool
- Ingredients
- For the Ice Cream Base
- For Coloring
- How to Make Red White and Blue Ice Cream
- Step 1: Prepare Your Containers
- Step 2: Chill Your Tools
- Step 3: Beat the Whipping Cream
- Step 4: Combine Milk Mixture
- Step 5: Fold Together
- Step 6: Divide Mixture
- Step 7: Add Color
- Step 8: Layer in Container
- Step 9: Freeze Overnight
- How to Serve Red White and Blue Ice Cream
- Scoop it in a Cone
- Sundae Bar Extravaganza
- Layered Parfaits
- Ice Cream Sandwiches
- Festive Bowls
- Drizzle with Fruit Sauce
- How to Perfect Red White and Blue Ice Cream
- Best Side Dishes for Red White and Blue Ice Cream
- Common Mistakes to Avoid
- Storage & Reheating Instructions
- Refrigerator Storage
- Freezing Red White and Blue Ice Cream
- Reheating Red White and Blue Ice Cream
- Frequently Asked Questions
- Can I use different flavors?
- How do I get vibrant colors?
- Can I make this ice cream dairy-free?
- How long does it take to make Red White and Blue Ice Cream?
- Final Thoughts
- 📖 Recipe Card
Why You’ll Love This Recipe
- Easy to Make: No ice cream maker required! Just whip, fold, and freeze for a hassle-free dessert.
- Festive Appeal: The red, white, and blue colors make it an ideal choice for holiday gatherings and summer parties.
- Rich Flavor: The combination of heavy whipping cream and sweetened condensed milk creates an irresistibly creamy texture and flavor.
- Customizable: Feel free to mix in your favorite toppings or switch up the colors for different occasions.
- Family-Friendly: Kids will love helping with the mixing and coloring process, making it a fun family activity.
Tools and Preparation
Before diving into the recipe, gather your tools and prepare your kitchen space. This will ensure a smooth process when making your Red White and Blue Ice Cream.
Essential Tools and Equipment
- Loaf pan or container
- Mixing bowls
- Whisk
- Electric mixer (optional)
- Food coloring
Importance of Each Tool
- Loaf pan or container: This holds the ice cream while it freezes, ensuring even distribution.
- Mixing bowls: Having separate bowls allows you to work with different colors easily.
- Whisk: A sturdy whisk is essential for beating the whipping cream to stiff peaks.
Ingredients
No churn vanilla ice cream that is turned into this patriotic dessert perfect for summer!
For the Ice Cream Base
- 2 cups very cold heavy whipping cream
- 1 can (14 oz sweetened condensed milk)
- 2 teaspoons pure vanilla extract
For Coloring
- Food coloring – Red
- Food coloring – Blue
How to Make Red White and Blue Ice Cream
Step 1: Prepare Your Containers
Place your loaf pan or container in the freezer for at least 30 minutes. This ensures that your ice cream stays cold while you prepare it.
Step 2: Chill Your Tools
Put your mixing bowl and whisk in the freezer for 30 minutes as well. Chilling these tools helps achieve better whipped cream consistency.
Step 3: Beat the Whipping Cream
Ensure that your heavy whipping cream is very cold. In a large bowl, beat it until stiff peaks form. This step is crucial for achieving that airy texture in your ice cream.
Step 4: Combine Milk Mixture
In another medium bowl, combine the sweetened condensed milk and vanilla extract. Mix until smooth.
Step 5: Fold Together
Gradually add the milk mixture to the whipped cream by gently folding it in. Be careful not to deflate the whipped cream during this step.
Step 6: Divide Mixture
Divide the combined mixture into three separate bowls—each should hold about 2 cups.
Step 7: Add Color
Using food coloring, color each bowl with a different color (red, white, blue) by gently folding in the dye until evenly distributed.
Step 8: Layer in Container
Remove your prepared container from the freezer. Drop spoonfuls of each colored mixture into the container alternately until it’s filled.
Step 9: Freeze Overnight
Cover your container with plastic wrap or a lid. Freeze overnight or until completely solid before serving.
Enjoy your homemade Red White and Blue Ice Cream as a festive treat!
How to Serve Red White and Blue Ice Cream
Serving your Red White and Blue Ice Cream can be just as festive as making it. This patriotic dessert is perfect for summer gatherings, barbecues, or any celebration. Here are some fun and creative ways to serve this delightful treat.
Scoop it in a Cone
- Use classic sugar cones for a crunchy texture that pairs perfectly with the creamy ice cream.
Sundae Bar Extravaganza
- Set up a sundae bar with toppings like sprinkles, chocolate sauce, and fresh fruits to let everyone customize their dessert.
Layered Parfaits
- Create beautiful layers by alternating scoops of ice cream with granola or crushed cookies in clear glasses.
Ice Cream Sandwiches
- Use soft cookies to make delicious ice cream sandwiches that are easy to eat and loved by all ages.
Festive Bowls
- Serve the ice cream in red, white, and blue bowls for added patriotism during holidays like the Fourth of July.
Drizzle with Fruit Sauce
- Top the ice cream with homemade berry sauce using strawberries and blueberries for an extra fruity touch.
How to Perfect Red White and Blue Ice Cream
To achieve the best texture and flavor in your Red White and Blue Ice Cream, consider these tips that will elevate your dessert game.
- Chill everything beforehand: Make sure your mixing bowl, whisk, and ingredients are very cold. This will help the whipping cream hold its shape better.
- Gently fold mixtures: When combining the sweetened condensed milk with whipped cream, use a gentle folding technique to maintain the airy texture.
- Use gel food coloring: Gel colors provide vibrant hues without adding too much liquid to your mixture, ensuring the ice cream stays creamy.
- Freeze in layers: For a visually appealing presentation, freeze each colored layer individually before adding the next one.
Best Side Dishes for Red White and Blue Ice Cream
Pairing side dishes with your Red White and Blue Ice Cream can enhance your dessert experience. Here are some great options that complement this sweet treat perfectly.
- Fruit Salad: A refreshing mix of seasonal fruits adds a light contrast to the rich ice cream.
- Grilled Peaches: Sweet grilled peaches offer a warm flavor that pairs beautifully with cold ice cream.
- Chocolate Chip Cookies: Classic cookies are always a hit; serve them warm alongside scoops of ice cream.
- Brownie Bites: Rich brownie bites add decadence, making each bite even more indulgent when combined with ice cream.
- Pineapple Upside Down Cake: The caramelized pineapple complements the vanilla flavor of the ice cream nicely.
- Coconut Macaroons: These chewy treats provide a tropical flair that works well with any flavor of ice cream.
Common Mistakes to Avoid
Making Red White and Blue Ice Cream can be fun, but it’s easy to make mistakes. Here are some common pitfalls to watch out for:
- Skipping the chilling step: Failing to chill the bowl and whisk can lead to soft peaks. Ensure you freeze them for at least 30 minutes before starting.
- Overmixing the cream: Be careful when folding in the condensed milk mixture. Overmixing can deflate your whipped cream, resulting in a dense texture. Gently fold instead!
- Not using cold ingredients: Warm heavy cream or condensed milk will not whip properly. Always start with very cold ingredients for the best results.
- Ignoring freezing time: Rushing the freezing process can yield a mushy texture. Make sure to freeze your ice cream overnight for optimal firmness.
- Skipping food coloring: If you want a true patriotic look, don’t forget to add enough food coloring. Mix gently to avoid swirling rather than layering.
Storage & Reheating Instructions
Refrigerator Storage
- Store in an airtight container for up to 2 days in the refrigerator.
- Cover with plastic wrap or aluminum foil to prevent ice crystals from forming.
Freezing Red White and Blue Ice Cream
- For long-term storage, keep in an airtight container for up to 2 months in the freezer.
- Label your container with the date to track freshness easily.
Reheating Red White and Blue Ice Cream
- Oven: Not recommended; ice cream should be served frozen.
- Microwave: Use short bursts of 10-15 seconds on low power if you need it slightly softened.
- Stovetop: Not suitable for ice cream; serve directly from the freezer.
Frequently Asked Questions
Here are some frequently asked questions about making Red White and Blue Ice Cream.
Can I use different flavors?
You can definitely customize this recipe! Try using chocolate or strawberry flavored condensed milk for a twist.
How do I get vibrant colors?
For bright colors, use gel food coloring instead of liquid dye as it provides a more intense color without adding too much liquid.
Can I make this ice cream dairy-free?
Yes! Substitute coconut cream or almond milk and dairy-free condensed milk for a delicious dairy-free version.
How long does it take to make Red White and Blue Ice Cream?
The preparation takes about 15 minutes, but remember that freezing overnight is essential!
Final Thoughts
This Red White and Blue Ice Cream is not only delicious but also a delightful treat perfect for summer gatherings or holiday celebrations. It’s versatile, allowing you to customize flavors and colors according to your preferences. Don’t hesitate to try it out — your family and friends will love this festive dessert!
Did You Enjoy Making This Recipe? Please rate this recipe with ⭐⭐⭐⭐⭐ or leave a comment.
📖 Recipe Card
Print
Red White and Blue Ice Cream
- Total Time: 0 hours
- Yield: Approximately 6 servings 1x
Description
Red White and Blue Ice Cream is an easy, no-churn dessert that’s perfect for summer festivities. With its vibrant layers of creamy vanilla ice cream tinted in patriotic colors, it’s a delightful treat for barbecues, Fourth of July celebrations, or any warm-weather gathering. This recipe requires minimal effort and no fancy equipment, making it a fun activity to prepare with family and friends. Just whip, fold, freeze, and enjoy the refreshing taste of summer!
Ingredients
- 2 cups heavy whipping cream
- 1 can (14 oz) sweetened condensed milk
- 2 teaspoons pure vanilla extract
- Red food coloring
- Blue food coloring
Instructions
- Chill your mixing bowl and whisk in the freezer for 30 minutes.
- In the chilled bowl, beat the heavy whipping cream until stiff peaks form.
- In a separate bowl, mix sweetened condensed milk with vanilla extract until smooth.
- Gently fold the milk mixture into the whipped cream without deflating it.
- Divide this mixture into three bowls and color one red and another blue using food coloring.
- Layer spoonfuls of each colored mixture into a loaf pan.
- Cover and freeze overnight or until solid.
- Prep Time: 15 minutes
- Cook Time: Freezing overnight
- Category: Dessert
- Method: No-churn
- Cuisine: American
Nutrition
- Serving Size: 1/2 cup (120g)
- Calories: 210
- Sugar: 22g
- Sodium: 70mg
- Fat: 15g
- Saturated Fat: 9g
- Unsaturated Fat: 5g
- Trans Fat: 0g
- Carbohydrates: 20g
- Fiber: 0g
- Protein: 3g
- Cholesterol: 50mg