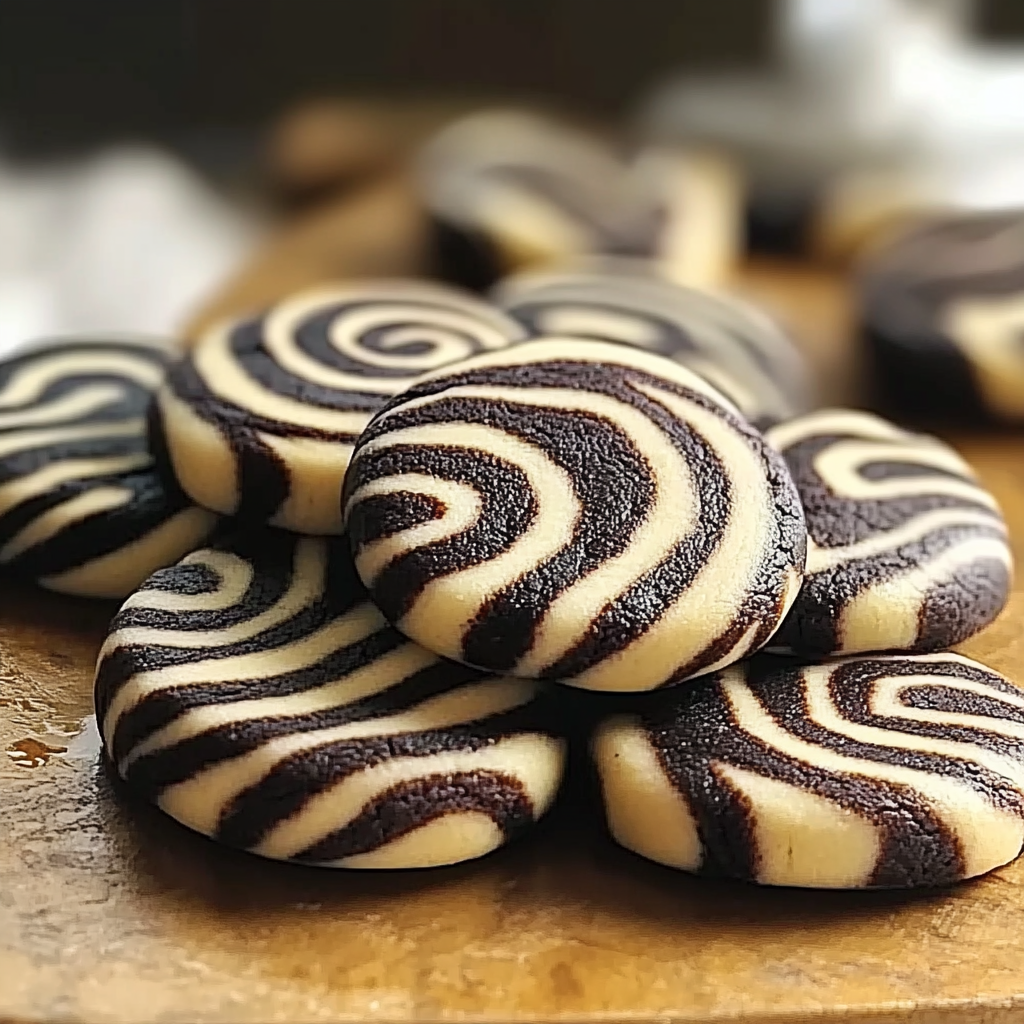
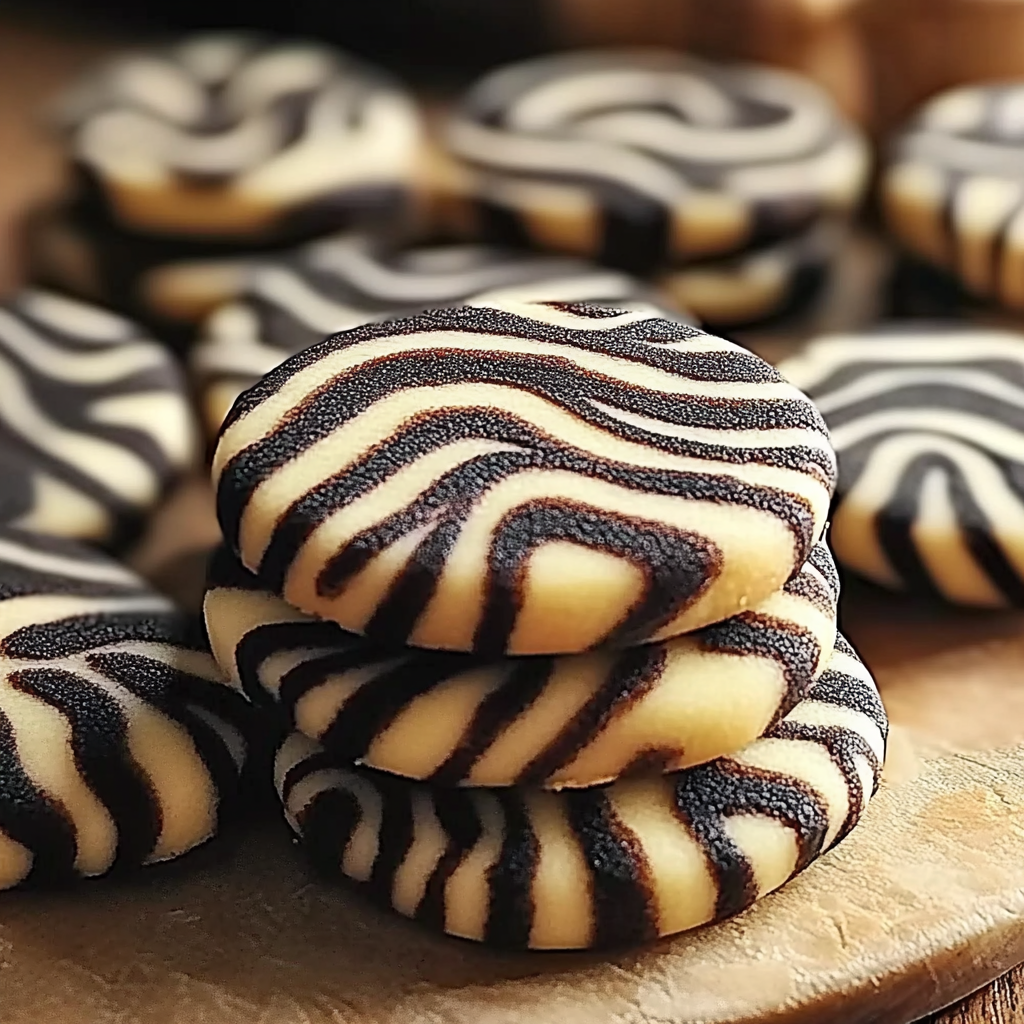
Zebra cookies are a delightful treat that combines the rich flavors of chocolate and vanilla in a visually stunning way. This cookie recipe captures the imagination with its striking black-and-white stripes, making it not just a dessert but also a conversation piece at any gathering. Perfect for holidays, birthdays, or simply an afternoon snack, zebra cookies are as fun to make as they are to eat. a perfect dessert pairing The beauty of these cookies lies in their simplicity; you can whip them up in under an hour from start to finish. With just a few ingredients and some basic baking techniques, you’ll create a batch that’s sure to impress family and friends alike. So grab your mixing bowl and prepare for a baking adventure that will fill your kitchen with the irresistible aroma of sweet treats!
Jump to:
- Why You’ll Love This Zebra Cookies Recipe
- Ingredients for Zebra Cookies Recipe
- How to Make Zebra Cookies Recipe
- Tips and Tricks
- How to Serve Zebra Cookies Recipe
- Make Ahead and Storage
- Suggestions for Zebra Cookies Recipe:
- Use Room Temperature Ingredients
- Don’t Overmix the Dough
- Measuring Ingredients Accurately
- Chill the Dough Before Baking
- FAQs:
- What makes zebra cookies unique?
- Can I substitute ingredients in my zebra cookies recipe?
- How do I store leftover zebra cookies?
- Can I freeze my zebra cookie dough?
- Conclusion for Zebra Cookies Recipe:
- 📖 Recipe Card
Why You’ll Love This Zebra Cookies Recipe
For more inspiration, check out this Strawberry Crunch Poke Cake recipe.
- Eye-Catching Presentation: The striking contrast of chocolate and vanilla creates beautiful cookies that are sure to impress anyone who sees them.
- Fun for All Ages: Involve kids or friends in the cookie-making process for a fun activity that everyone can enjoy together.
- Customizable Flavors: Feel free to experiment by adding nuts or different flavored extracts to tailor the cookies to your taste.
Ingredients for Zebra Cookies Recipe
Here’s what you’ll need to make this delicious dish:
- All-Purpose Flour: Essential for structure, use unbleached all-purpose flour for the best texture.
- Cocoa Powder: Unsweetened cocoa powder gives the chocolate portion its rich flavor; opt for high-quality brands for best results.
- Baking Powder: This leavening agent helps the cookies rise and achieve that perfect chewy texture.
- Butter: Use unsalted butter at room temperature for easy mixing and a rich flavor profile.
- Sugar: Granulated sugar sweetens the dough; consider using brown sugar for added moisture and depth of flavor.
- Eggs: Two large eggs provide moisture and act as binding agents, ensuring your cookies hold together well.
The full ingredients list, including measurements, is provided in the recipe card directly below.
How to Make Zebra Cookies Recipe
Follow these simple steps to prepare this delicious dish:
Step 1: Preheat Your Oven
Start by preheating your oven to 350°F (175°C). Line two baking sheets with parchment paper to prevent sticking.
Step 2: Prepare Dry Ingredients
In a mixing bowl, whisk together flour, cocoa powder, baking powder, and salt. Set this mixture aside while you prepare the wet ingredients.
Step 3: Cream Butter and Sugar
In another bowl, cream together softened butter and granulated sugar until light and fluffy. This should take about 3-5 minutes using an electric mixer.
Step 4: Add Eggs
Add eggs one at a time to the butter-sugar mixture, beating well after each addition until fully incorporated.
Step 5: Combine Wet and Dry Ingredients
Gradually add the dry ingredient mixture into the wet ingredients. Mix until just combined; avoid overmixing to keep your cookies tender.
Step 6: Shape and Bake
Scoop tablespoon-sized portions of dough onto prepared baking sheets, alternating between chocolate and vanilla doughs to create the zebra effect. Bake for about 10-12 minutes until edges are set but centers are still soft.
Transfer cookies to wire racks to cool completely before serving.
Tips and Tricks
Here are some helpful tips to ensure the best results for your dish:
- Room Temperature Ingredients: Ensure your butter and eggs are at room temperature for better mixing and texture.
- Chill Dough if Necessary: If the dough feels too sticky, refrigerate it for about 30 minutes before shaping.
- Uniform Size: Use a cookie scoop or measuring spoon for consistent cookie sizes which helps them bake evenly.
How to Serve Zebra Cookies Recipe
This Zebra Cookies Recipe is versatile and pairs wonderfully with:
- Milk: A classic pairing that enhances the flavors of the cookies and offers a delightful contrast in texture.
- Coffee: The rich, bold taste of coffee complements the sweetness of the zebra cookies perfectly.
- Iced Tea: A refreshing beverage that balances the sweetness and makes for a great afternoon treat.
Feel free to pair it with your favorite sides for a personalized meal!
Make Ahead and Storage
- Make Ahead: You can prepare the cookie dough ahead of time. Chill it in the refrigerator for up to 24 hours before baking. This allows the flavors to meld beautifully.
- Storing: Store leftover zebra cookies in an airtight container at room temperature for up to one week. For longer storage, you can freeze them for up to three months.
- Reheating: To reheat, place cookies on a baking sheet and warm them in a preheated oven at 350°F (175°C) for about 5-7 minutes. This restores their softness and flavor.
Suggestions for Zebra Cookies Recipe:
Use Room Temperature Ingredients
Using room temperature ingredients is crucial for achieving the perfect texture in your zebra cookies. When butter, eggs, and other ingredients are at room temperature, they blend more easily, creating a smooth batter. Cold ingredients can lead to uneven mixing and a dense cookie. Plan ahead and take your butter and eggs out of the fridge about 30 minutes prior to baking. perfect for brunch gatherings This small step significantly impacts the final outcome of your zebra cookies recipe. Not only will they rise better, but you will also enjoy a softer and chewier cookie that melts in your mouth.
Don’t Overmix the Dough
Overmixing the dough is a common mistake that can ruin the texture of your zebra cookies. When you mix too much, you develop gluten, which can make the cookies tough instead of soft and tender. To avoid this, mix just until the ingredients are combined. You may still see some streaks of flour; that’s perfectly fine. Once you add the cocoa mixture for the zebra effect, be gentle. This will ensure your cookies remain light and airy while maintaining that beautiful striped appearance.
Measuring Ingredients Accurately
Accurate measurement of ingredients is key when following a zebra cookies recipe. Baking is a science, and even slight variations can affect how your cookies turn out. Use dry measuring cups for flour and sugar, leveling them off with a knife to ensure precision. For sticky ingredients like syrup or honey, use liquid measuring cups for accuracy. Invest in a kitchen scale if possible; it helps to measure by weight rather than volume for consistent results every time you bake. For more inspiration, check out this Oatmeal Breakfast Cookies recipe.
Chill the Dough Before Baking
Chilling the dough before baking is an essential step often overlooked in many zebra cookies recipes. Chilling allows the fat in the dough to solidify, preventing spreading during baking. This results in thicker, fudgier cookies with defined stripes rather than flat puddles on your baking sheet. Wrap your dough in plastic wrap and refrigerate it for at least 30 minutes before scooping onto your cookie sheets. This simple step enhances both flavor and texture while ensuring that classic zebra design remains intact.
FAQs:
What makes zebra cookies unique?
Zebra cookies are unique because of their striking visual appeal created by their signature black and white stripes made from vanilla and chocolate dough. This eye-catching pattern not only makes them stand out but also offers a delightful contrast in flavors—sweet vanilla paired with rich chocolate creating a harmonious blend that pleases both kids and adults alike. a unique dessert experience Each bite delivers an exciting texture as well, combining soft cookie goodness with visually stimulating designs that make them perfect for any occasion or event.
Can I substitute ingredients in my zebra cookies recipe?
Yes, you can substitute certain ingredients in your zebra cookies recipe based on dietary preferences or what you have available at home. For example, if you’re looking for a healthier option, consider using whole wheat flour instead of all-purpose flour; just note that it may alter the texture slightly. another delightful dessert option You can also replace white sugar with brown sugar for added moisture and depth of flavor or use dairy-free butter alternatives if you’re lactose intolerant. Just remember that substitutions might affect baking times or textures, so keep an eye on your cookies while they bake.
How do I store leftover zebra cookies?
To store leftover zebra cookies properly, allow them to cool completely after baking before placing them in an airtight container. Layer parchment paper between each layer of cookies to prevent sticking together. Store the container at room temperature for up to five days or refrigerate it if you prefer longer shelf life—up to two weeks total freshness guaranteed! If you want to keep them even longer, consider freezing them by wrapping each cookie tightly in plastic wrap followed by aluminum foil—this helps maintain their texture and flavor over time.
Can I freeze my zebra cookie dough?
Absolutely! Freezing zebra cookie dough is a great way to save time without sacrificing freshness when you’re ready to bake later on. After preparing your dough according to the recipe instructions, shape it into discs or logs depending on preference then wrap tightly in plastic wrap followed by aluminum foil or place inside freezer bags with most air removed before sealing completely shut! Dough can typically be stored frozen for up to three months—just thaw overnight in the fridge before rolling out or cutting shapes as needed!
Conclusion for Zebra Cookies Recipe:
In summary, mastering the art of making delicious zebra cookies involves avoiding common mistakes such as using cold ingredients or overmixing dough. Accurate measurements play an essential role alongside chilling techniques that enhance both flavor and appearance significantly! By following these tips, along with answering frequent questions about ingredient substitutions or storage methods effectively ensures success every time you whip up this delightful treat! Enjoy sharing these beautifully striped delights with friends and family while basking in their compliments—a true testament to your baking prowess!
Did You Enjoy Making This Recipe? Please rate this recipe with ⭐⭐⭐⭐⭐ or leave a comment.
📖 Recipe Card
Print
Zebra Cookies
- Total Time: 27 minutes
- Yield: Approximately 24 cookies 1x
Description
Zebra cookies are a delightful blend of chocolate and vanilla, creating visually stunning treats that are perfect for any occasion. These cookies feature eye-catching black-and-white stripes that not only taste amazing but also serve as a fun centerpiece for parties or family gatherings. Easy to whip up in under an hour, zebra cookies are enjoyable to make and even more delicious to eat. Gather your baking supplies and get ready to impress everyone with these charmingly striped delights!
Ingredients
- 2 cups all-purpose flour
- 1/2 cup unsweetened cocoa powder
- 1 tsp baking powder
- 1 cup unsalted butter (room temperature)
- 1 cup granulated sugar
- 2 large eggs
Instructions
- Preheat your oven to 350°F (175°C) and line two baking sheets with parchment paper.
- In a bowl, whisk together flour, cocoa powder, baking powder, and a pinch of salt; set aside.
- In another bowl, cream the softened butter and sugar until light and fluffy (about 3-5 minutes).
- Add eggs one at a time, mixing well after each addition.
- Gradually incorporate the dry ingredients into the wet mixture until just combined.
- Scoop tablespoon-sized portions of dough onto the prepared sheets, alternating between chocolate and vanilla dough for the zebra effect.
- Bake for 10-12 minutes or until edges are set but centers remain soft. Cool completely on wire racks before serving.
- Prep Time: 15 minutes
- Cook Time: 12 minutes
- Category: Dessert
- Method: Baking
- Cuisine: American
Nutrition
- Serving Size: 1 cookie (30g)
- Calories: 150
- Sugar: 8g
- Sodium: 50mg
- Fat: 8g
- Saturated Fat: 5g
- Unsaturated Fat: 3g
- Trans Fat: 0g
- Carbohydrates: 18g
- Fiber: 1g
- Protein: 2g
- Cholesterol: 20mg