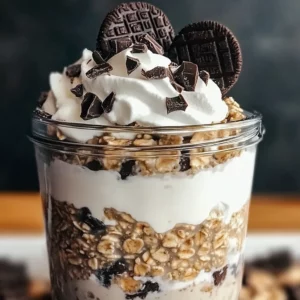
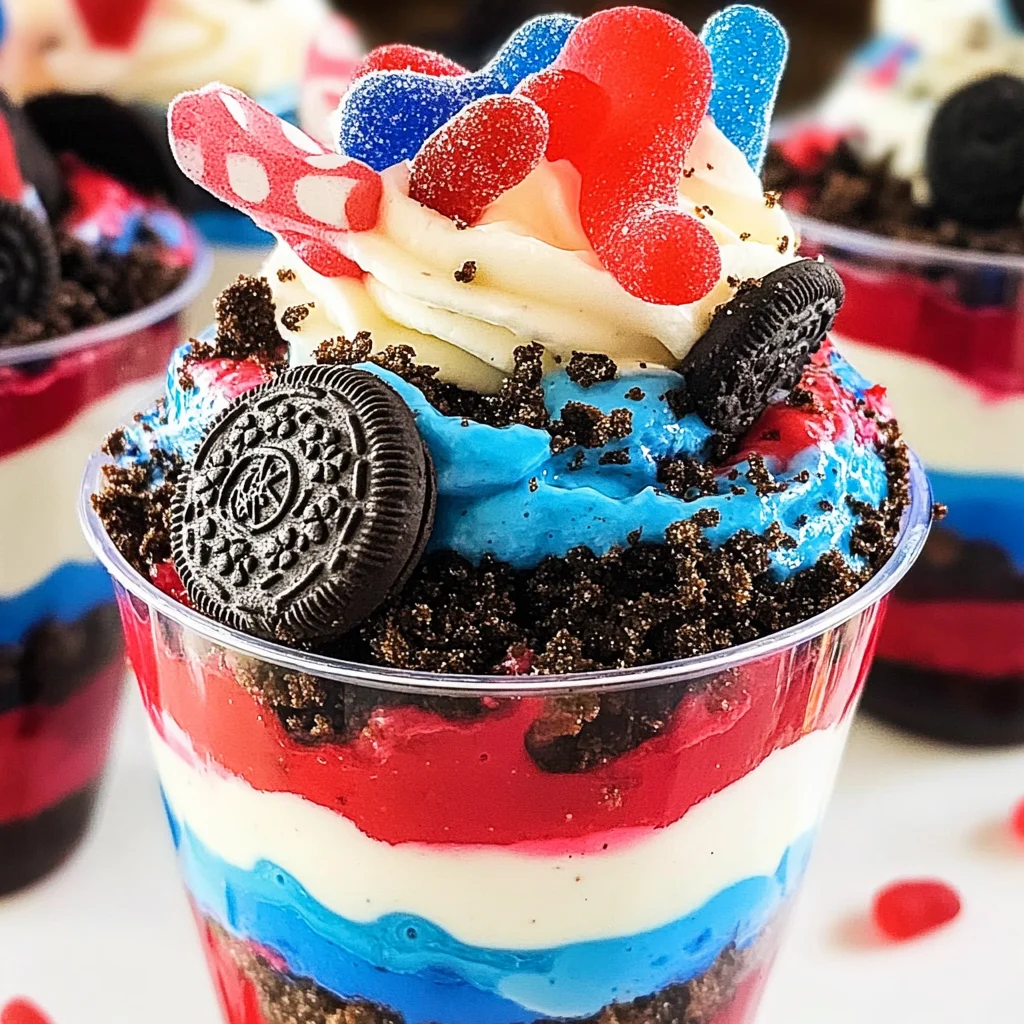
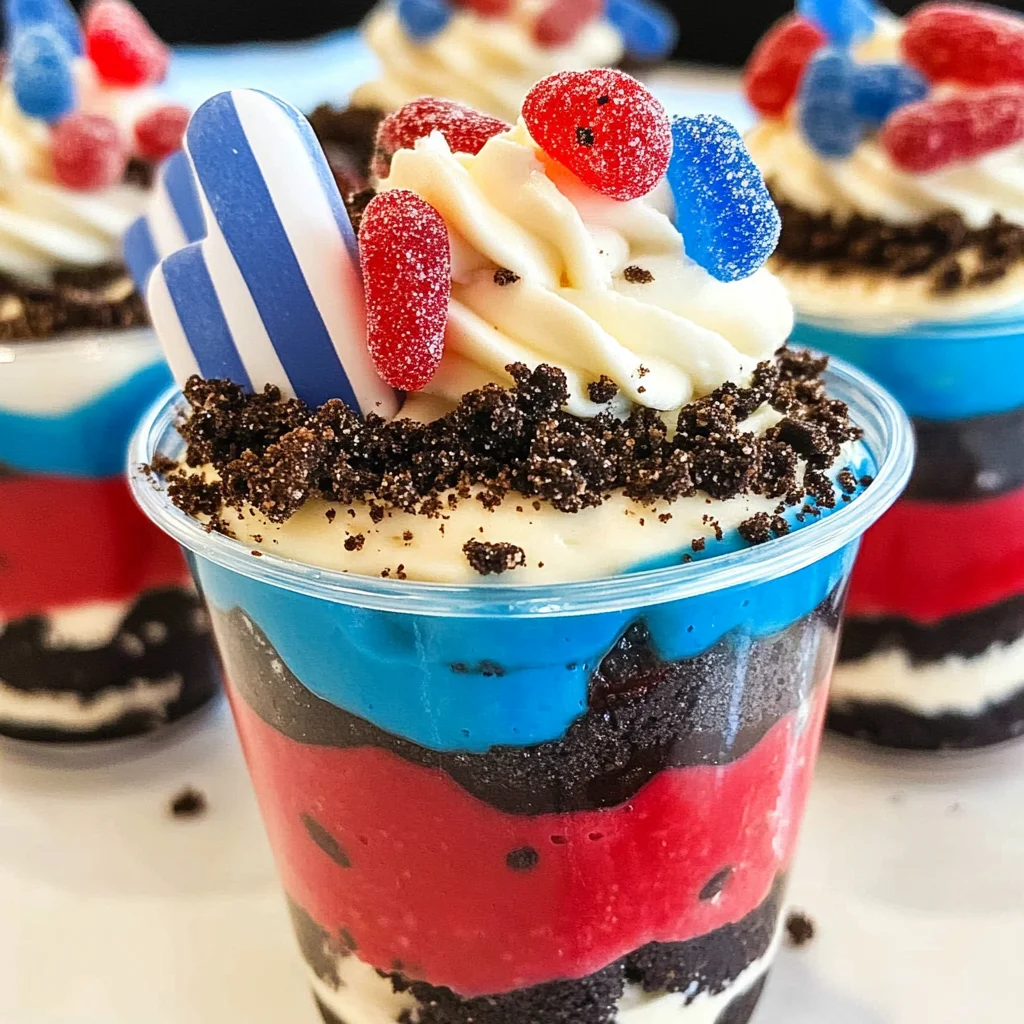
Easy no-bake Red, White and Blue Dirt Cups are a delightful summer dessert that captures the spirit of the 4th of July! With layers of creamy pudding, crushed Oreos, and colorful gummy worms, these cups make a fun treat for kids and adults alike. Perfect for picnics, barbecues, or any festive occasion, they are simple to assemble and visually appealing. Get ready to impress your guests with a dessert that is as tasty as it is festive!
Jump to:
- Why You’ll Love This Recipe
- Tools and Preparation
- Essential Tools and Equipment
- Importance of Each Tool
- Ingredients
- Pudding Base
- Toppings
- How to Make Red, White and Blue Dirt Cups
- Step 1: Prepare the Pudding
- Step 2: Divide the Pudding Mixture
- Step 3: Add Food Coloring
- Step 4: Assemble Your Dirt Cups
- How to Serve Red, White and Blue Dirt Cups
- Individual Cups
- Family Style
- Dessert Bar
- Picnic Treats
- How to Perfect Red, White and Blue Dirt Cups
- Best Side Dishes for Red, White and Blue Dirt Cups
- Common Mistakes to Avoid
- Refrigerator Storage
- Freezing Red, White and Blue Dirt Cups
- Reheating Red, White and Blue Dirt Cups
- Frequently Asked Questions
- What are Red, White and Blue Dirt Cups?
- How long does it take to make Red, White and Blue Dirt Cups?
- Can I customize my Red, White and Blue Dirt Cups?
- How many servings do Red, White and Blue Dirt Cups yield?
- Final Thoughts
- 📖 Recipe Card
Why You’ll Love This Recipe
- Kid-Friendly Fun: These dirt cups are perfect for little hands to help make and enjoy!
- No-Bake Convenience: Quick to prepare with minimal cooking involved—great for last-minute gatherings.
- Colorful Presentation: The vibrant layers make these cups a showstopper at any event.
- Customizable Layers: Feel free to swap out flavors or toppings based on your preferences.
- Easy Cleanup: Using plastic cups means less mess and easy disposal after the fun!
Tools and Preparation
Before you begin making your Red, White and Blue Dirt Cups, gather your tools. Having everything ready will streamline the process.
Essential Tools and Equipment
- Mixing bowls
- Whisk
- Plastic cups
- Measuring cups
- Spoon
Importance of Each Tool
- Mixing bowls: Essential for combining ingredients evenly without making a mess.
- Whisk: Helps achieve a smooth pudding texture by thoroughly blending milk and pudding mix.
Ingredients
For these delicious Red, White and Blue Dirt Cups, you’ll need the following ingredients:
Pudding Base
- 2 boxes cheesecake pudding (3.4 ounces each)
- 4 cups milk
Toppings
- 19 Oreo cookies (crushed)
- ¼ teaspoon red gel food dye
- ¼ teaspoon blue gel food dye
- 8 red and blue gummy worms
How to Make Red, White and Blue Dirt Cups
Step 1: Prepare the Pudding
- Place both boxes of pudding in a large mixing bowl.
- Add the milk to the bowl.
- Whisk until the pudding has thickened.
Step 2: Divide the Pudding Mixture
- Scoop 1 cup of pudding into a separate bowl.
- Transfer 1 ½ cups of pudding into another bowl.
Step 3: Add Food Coloring
- To the bowl with 1 cup of pudding, add the blue dye.
- Stir until fully combined.
- In the other bowl (with 1 ½ cups), add the red dye and mix well.
Step 4: Assemble Your Dirt Cups
- Line up your plastic cups on a flat surface.
- Place 1 tablespoon of crushed Oreos at the bottom of each cup; spread evenly.
- Add 2 tablespoons of blue pudding on top; gently spread it out.
- Repeat by adding another tablespoon of crushed Oreos on top of the blue layer; spread evenly again.
- Pour in 3 tablespoons of white pudding next; spread evenly across the layer.
- Add another 1 ½ tablespoons of white pudding on top; smooth it out.
- Lastly, add 4 tablespoons of red pudding as your final layer.
- For decoration, top each cup with 2 tablespoons of crushed Oreos.
- Finish by adding two gummy worms per cup and one flag for flair.
Now you’re all set to enjoy these festive Red, White and Blue Dirt Cups! Perfect for celebrating Independence Day or any summer gathering!
How to Serve Red, White and Blue Dirt Cups
These delightful Red, White and Blue Dirt Cups are perfect for any summer gathering, especially during the 4th of July. They are not only visually appealing but also fun to eat. Here are some creative ways to serve them!
Individual Cups
- Serve each dirt cup in a clear plastic cup for a fun, layered look.
- Add a small American flag on top for festive flair.
Family Style
- Arrange several cups on a large platter for a communal dessert.
- Garnish the platter with fresh strawberries or blueberries to enhance the patriotic theme.
Dessert Bar
- Set up a DIY dessert bar where guests can build their own dirt cups.
- Provide extra toppings like whipped cream, sprinkles, or additional gummy candies.
Picnic Treats
- Pack individual cups in a cooler for a picnic.
- Use lids on the cups to keep them secure during transport.
How to Perfect Red, White and Blue Dirt Cups
To create the ultimate Red, White and Blue Dirt Cups, keep these tips in mind. They will help you achieve a visually stunning and tasty treat.
- Use Fresh Ingredients: Always opt for fresh milk and high-quality pudding mix for the best flavor.
- Layer Carefully: Take your time when layering the ingredients to maintain distinct colors.
- Chill Before Serving: Refrigerating your dirt cups before serving allows flavors to meld and pudding to set properly.
- Customize Toppings: Feel free to add other toppings like whipped cream or fruit for added texture and flavor.
Best Side Dishes for Red, White and Blue Dirt Cups
Pairing side dishes with your Red, White and Blue Dirt Cups can enhance your dessert experience. Here are some great options:
- Grilled Corn on the Cob: Sweet corn complements desserts beautifully; grill it with butter for extra taste.
- Potato Salad: A classic summer dish that contrasts well with sweet desserts.
- Fruit Salad: A refreshing option that adds color and healthiness to your meal.
- Caprese Skewers: These skewers of mozzarella, tomatoes, and basil offer savory bites between sweet treats.
- BBQ Chicken Wings: The smoky flavor of wings balances out the sweetness of the dirt cups perfectly.
- Veggie Platter: Fresh veggies provide crunch and balance out the richness of the dessert.
Common Mistakes to Avoid
Making Red, White and Blue Dirt Cups can be fun, but there are a few common mistakes you should avoid to ensure your dessert turns out perfectly.
- Skipping the pudding thickness check: Make sure your pudding thickens properly before layering. If it’s too runny, the layers will mix together.
- Neglecting to crush Oreos finely: If your Oreo pieces are too large, they won’t create nice layers. Use a food processor or crush them well in a bag.
- Not using gel food dye correctly: Add gel food dye gradually and mix thoroughly to achieve the vibrant colors without overdoing it.
- Forgetting the layering order: Follow the order of layers as specified in the instructions for the best visual appeal and taste balance.
- Using non-appropriate cups: Opt for clear plastic cups so that the beautiful layers of your Red, White and Blue Dirt Cups shine through.
Refrigerator Storage
- Store your dirt cups in an airtight container.
- They can last in the refrigerator for up to 3 days.
Freezing Red, White and Blue Dirt Cups
- Freezing is not recommended as it may change the texture of the pudding.
- If necessary, you can freeze for up to 1 month; however, expect a different consistency when thawed.
Reheating Red, White and Blue Dirt Cups
- Oven: Not recommended for this dessert; it’s best served chilled.
- Microwave: Avoid microwaving; it can ruin the texture of pudding.
- Stovetop: Not applicable; enjoy cold directly from storage.
Frequently Asked Questions
What are Red, White and Blue Dirt Cups?
Red, White and Blue Dirt Cups are a festive no-bake dessert featuring layers of cheesecake pudding, crushed Oreos, and colorful gummy worms. They are perfect for summer celebrations.
How long does it take to make Red, White and Blue Dirt Cups?
The prep time is just 10 minutes! This quick dessert requires no baking, making it an easy treat for any occasion.
Can I customize my Red, White and Blue Dirt Cups?
Absolutely! You can change up the colors with different food dyes or use various candies on top. Feel free to experiment with flavors too!
How many servings do Red, White and Blue Dirt Cups yield?
This recipe yields 4 delightful servings. You can easily double or triple the recipe to serve more guests at parties or gatherings.
Final Thoughts
These Red, White and Blue Dirt Cups are not only delicious but also visually striking, making them a perfect addition to any summer gathering or celebration. Their customizable nature allows you to get creative with flavors and toppings. Don’t hesitate to try this simple yet festive recipe at home!
Did You Enjoy Making This Recipe? Please rate this recipe with ⭐⭐⭐⭐⭐ or leave a comment.
📖 Recipe Card
Print
Red, White and Blue Dirt Cups
- Total Time: 0 hours
- Yield: 4 servings 1x
Description
Red, White and Blue Dirt Cups are a festive no-bake treat perfect for summer celebrations, especially during Independence Day. These delightful dessert cups feature layers of creamy cheesecake pudding, crushed Oreos, and colorful gummy worms that make them as fun to assemble as they are to eat. With vibrant hues of red, white, and blue, these cups not only taste amazing but also add a splash of color to any gathering. Plus, they’re easy enough for kids to help create! Impress your guests without the hassle of baking and enjoy this quick and simple dessert that will be a hit at your next picnic or barbecue.
Ingredients
- 2 boxes cheesecake pudding (3.4 ounces each)
- 4 cups milk
- 19 Oreo cookies (crushed)
- ¼ teaspoon red gel food dye
- ¼ teaspoon blue gel food dye
- 8 red and blue gummy worms
Instructions
- In a large mixing bowl, combine both boxes of pudding with the milk. Whisk until thickened.
- Divide the pudding into two bowls: one with 1 cup and the other with 1 ½ cups.
- Add blue gel food dye to the first bowl and mix until fully blended; repeat with red dye in the second bowl.
- Layer in clear plastic cups: start with crushed Oreos, then alternate layers of blue pudding, more Oreos, white pudding, more white pudding, and finally red pudding on top.
- Garnish each cup with crushed Oreos and two gummy worms for decoration.
- Prep Time: 10 minutes
- Cook Time: None
- Category: Dessert
- Method: No-Bake
- Cuisine: American
Nutrition
- Serving Size: 1 cup (150g)
- Calories: 320
- Sugar: 25g
- Sodium: 250mg
- Fat: 15g
- Saturated Fat: 8g
- Unsaturated Fat: 6g
- Trans Fat: 0g
- Carbohydrates: 43g
- Fiber: 2g
- Protein: 4g
- Cholesterol: 20mg