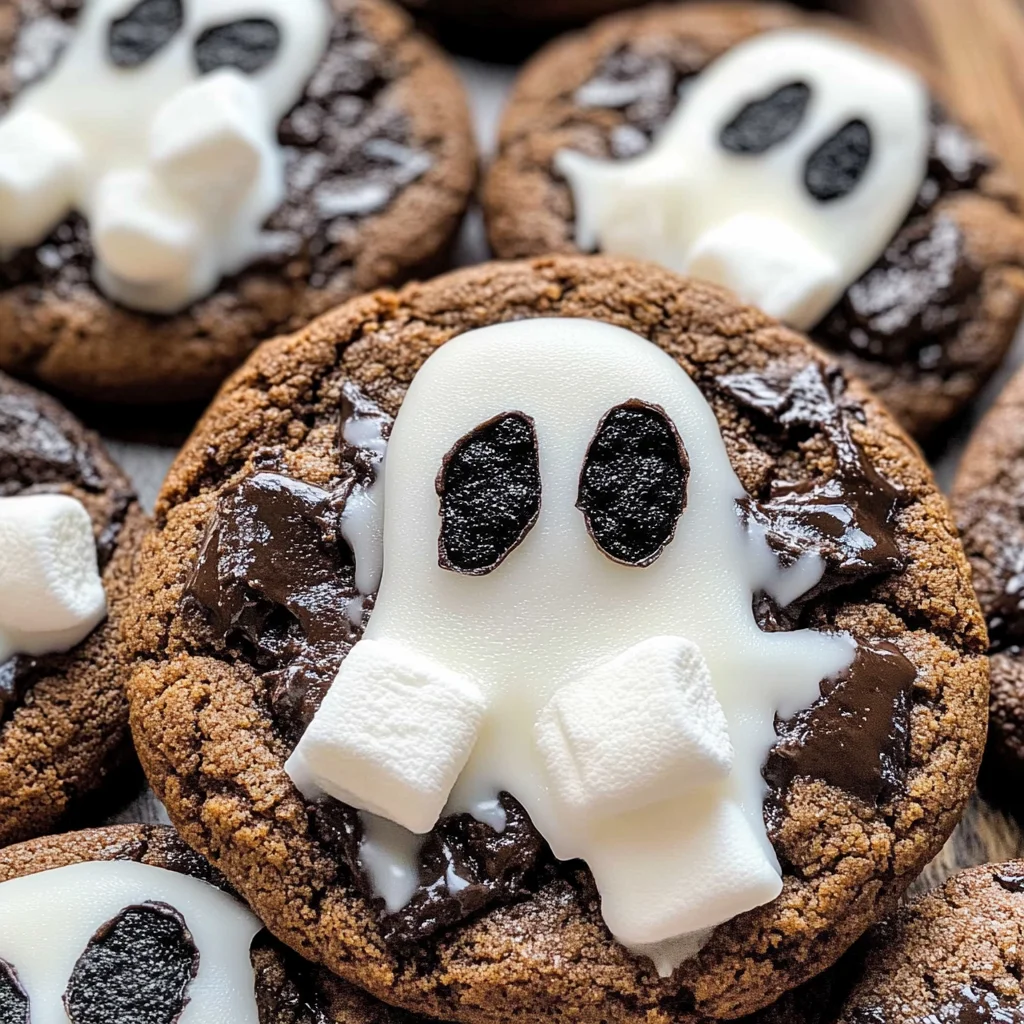
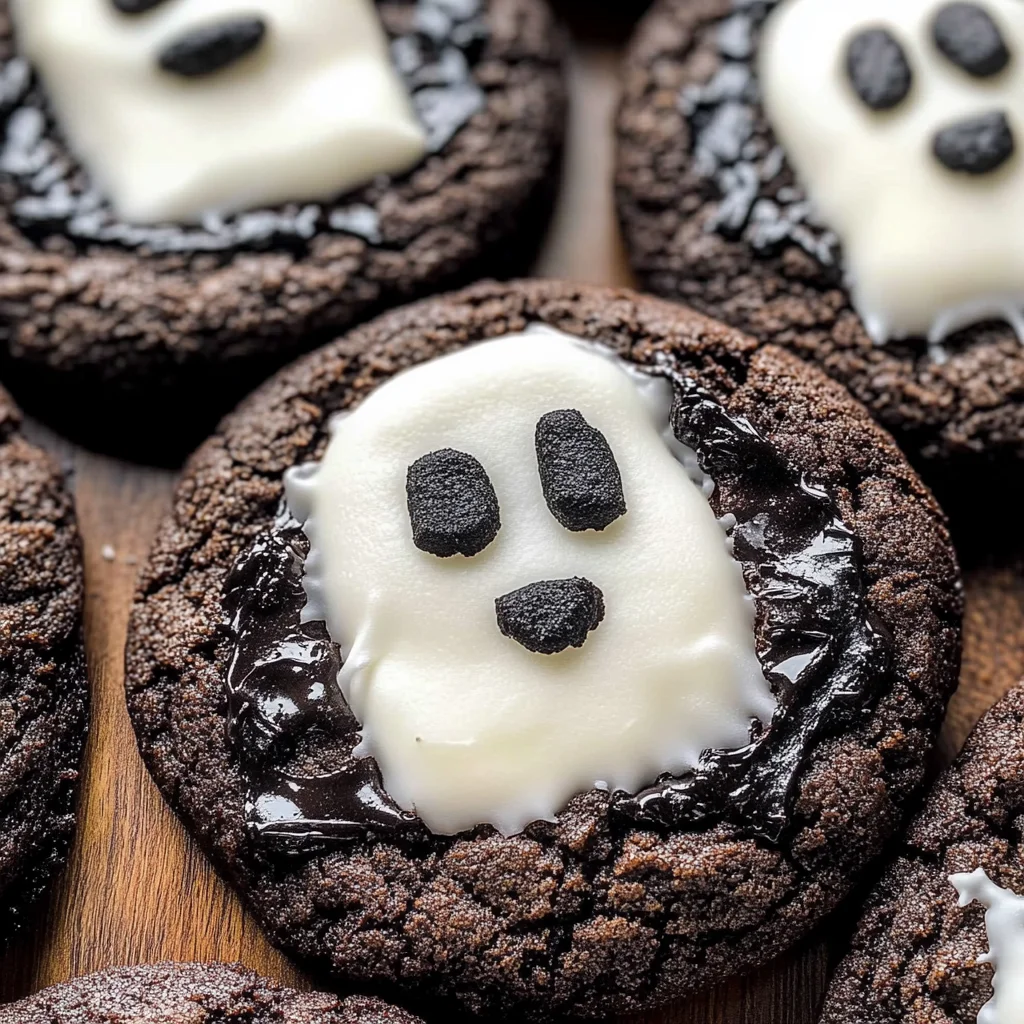
Ghost cookies are a fun and spooky way to celebrate Halloween. These treats are not only delicious but also incredibly easy to make. With just a few ingredients, you can transform ordinary cookies into delightful ghostly figures that will impress your family and friends. Perfect for Halloween parties or as a festive treat for kids, these ghost cookies are sure to be a hit!
Jump to:
- Why You’ll Love This Recipe
- Tools and Preparation
- Essential Tools and Equipment
- Importance of Each Tool
- Ingredients
- For the Ghost Cookies
- How to Make Ghost Cookies
- Step 1: Prepare Your Workspace
- Step 2: Decorate the Cookies
- Step 3: Add Marshmallows
- Step 4: Create Ghost Faces
- Step 5: Serve and Enjoy
- How to Serve Ghost cookies
- Fun Party Platters
- Individual Treat Bags
- Dessert Table Centerpiece
- Halloween Movie Night Snack
- Kids’ Activity Station
- Halloween-themed Breakfast
- How to Perfect Ghost cookies
- Best Side Dishes for Ghost cookies
- Common Mistakes to Avoid
- Storage & Reheating Instructions
- Refrigerator Storage
- Freezing Ghost cookies
- Reheating Ghost cookies
- Frequently Asked Questions
- Can I use other types of cookies for ghost cookies?
- How long does it take to make ghost cookies?
- Are ghost cookies suitable for kids?
- Can I customize my ghost cookies?
- What occasions are best for ghost cookies?
- Final Thoughts
- 📖 Recipe Card
Why You’ll Love This Recipe
- Quick and Easy: This recipe takes only 25 minutes from start to finish, making it perfect for last-minute treats.
- Fun for Kids: Get the kids involved in decorating these spooky cookies; they’ll love creating their own ghostly designs!
- Versatile Presentation: Use different types of cookies or decorations to personalize your ghost cookies for any occasion.
- Perfect for Parties: These treats are a great addition to any Halloween gathering, adding a playful touch to your dessert table.
Tools and Preparation
Before you get started on these ghost cookies, gather your tools and equipment. Having everything ready will make the process smooth and enjoyable.
Essential Tools and Equipment
- Mixing bowl
- Baking sheet
- Parchment paper
- Spatula
Importance of Each Tool
- Mixing bowl: A large bowl makes it easy to combine ingredients without spilling.
- Baking sheet: Provides a surface for your cookies to bake evenly.
- Parchment paper: Prevents sticking and makes cleanup easier.
- Spatula: Ideal for transferring cookies without breaking them.
Ingredients
For the Ghost Cookies
- 175g icing sugar
- 1 x 200g pack chocolate chunk cookies
- 9 marshmallows (regular size)
- black writing icing
How to Make Ghost Cookies
Step 1: Prepare Your Workspace
Ensure you have a clean, flat surface to work on. Lay out all your ingredients and tools so they are easily accessible.
Step 2: Decorate the Cookies
- Take one cookie from the pack of chocolate chunk cookies.
- Place it on a baking sheet lined with parchment paper.
- Using a spatula, spread a layer of icing sugar over the top of the cookie.
Step 3: Add Marshmallows
- Take one regular-sized marshmallow and place it on top of each iced cookie.
- Press down gently so that the marshmallow adheres well to the icing.
Step 4: Create Ghost Faces
- With black writing icing, draw eyes and a mouth on each marshmallow to give them a spooky look.
- Let your creativity flow! Make some friendly ghosts or some that look more frightful.
Step 5: Serve and Enjoy
Once you’ve decorated all your ghost cookies, they are ready to serve! Place them on a festive platter and watch them disappear at your Halloween gathering. Enjoy your deliciously spooky creations!
How to Serve Ghost cookies
These delightful ghost cookies are perfect for Halloween festivities. They can be served in a variety of creative ways that will impress your guests and add to the spooky atmosphere.
Fun Party Platters
- Arrange ghost cookies on a large platter with other Halloween treats like candy corn and chocolate spiders to create an enticing display.
Individual Treat Bags
- Place each ghost cookie in a small, clear bag tied with a spooky ribbon for a fun party favor that guests can take home.
Dessert Table Centerpiece
- Use ghost cookies as a centerpiece on your dessert table surrounded by themed decorations like mini pumpkins and faux cobwebs for an eye-catching effect.
Halloween Movie Night Snack
- Serve ghost cookies alongside popcorn and other snacks during a Halloween movie marathon for a cozy treat experience.
Kids’ Activity Station
- Set up a decorating station where kids can add their own designs to plain ghost cookies using icing and edible decorations for a fun hands-on activity.
Halloween-themed Breakfast
- Surprise your family with ghost cookies served alongside milk or hot chocolate for a festive breakfast treat on Halloween morning.
How to Perfect Ghost cookies
To ensure your ghost cookies turn out perfectly every time, follow these simple tips.
- Choose the right cookies: Start with high-quality chocolate chunk cookies as the base; they provide the ideal texture and flavor for your ghostly creations.
- Use fresh icing sugar: Fresh icing sugar will help create smooth and stable frosting, making it easier to achieve that perfect ghostly appearance.
- Cut marshmallows accurately: For consistent sizes, slice marshmallows evenly so they sit nicely on the cookie without toppling over.
- Practice piping techniques: Use black writing icing to practice your piping skills on parchment paper before decorating the actual cookies. This helps you achieve cleaner lines.
- Let them set properly: Allow the icing to dry completely before serving or stacking, ensuring that your ghost cookies maintain their spooky design.
Best Side Dishes for Ghost cookies
Ghost cookies pair well with various side dishes, making them even more delightful. Here are some excellent options to consider:
- Pumpkin Spice Latte – A warm drink that complements the sweetness of the ghost cookies perfectly.
- Candy Corn Mix – A colorful mix of candy corn, nuts, and chocolate adds crunch and flavor contrast.
- Caramel Apples – Sweet and tangy caramel apples make a classic Halloween treat that balances the sweetness of the cookies.
- Chocolate Pudding Cups – Creamy chocolate pudding cups topped with crushed cookie crumbs mimic graveyard dirt and enhance the spooky theme.
- Spooky Fruit Skewers – Assemble fruit skewers with grapes and melon balls shaped like ghosts for a healthy yet festive option.
- Cheesy Pumpkin Soup – A warm bowl of cheesy pumpkin soup provides comfort while adding some savory contrast to sweet treats.
Common Mistakes to Avoid
It’s easy to make mistakes when creating spooky ghost cookies. Here are some common pitfalls and how to steer clear of them.
- Skipping the Icing Sugar: Not using enough icing sugar can lead to a runny consistency. Make sure to measure accurately for the best results.
- Overheating the Marshmallows: Microwave marshmallows for too long, and they may become too sticky or explode. Heat in short intervals to avoid this issue.
- Ignoring Decoration Details: Forgetting the black writing icing can make your ghost cookies look less spooky. Take time to decorate them for that ghostly touch.
- Using Old Ingredients: Baking with stale cookies or expired icing sugar can ruin your treats. Always check the freshness of your ingredients before starting.
- Not Following the Recipe Timing: Rushing through the preparation can lead to mistakes. Stick to the recommended prep time for best results.
Storage & Reheating Instructions
Refrigerator Storage
- Store ghost cookies in an airtight container.
- They will stay fresh for up to 3 days in the refrigerator.
Freezing Ghost cookies
- Place cookies in a freezer-safe container or bag.
- They can be frozen for up to 2 months.
Reheating Ghost cookies
- Oven: Preheat your oven to 350°F (175°C) and warm cookies for about 5 minutes.
- Microwave: Heat each cookie on a microwave-safe plate for about 10-15 seconds until warm.
- Stovetop: Use a pan on low heat and warm briefly, turning occasionally to avoid burning.
Frequently Asked Questions
Curious about more details on making these delightful treats? Here are some commonly asked questions about ghost cookies.
Can I use other types of cookies for ghost cookies?
Yes! You can use any type of cookie as a base, but chocolate chunk cookies give a great flavor and texture.
How long does it take to make ghost cookies?
The entire process takes about 25 minutes from start to finish, making it a quick Halloween treat!
Are ghost cookies suitable for kids?
Absolutely! These fun treats are perfect for kids and are easy enough for them to help make.
Can I customize my ghost cookies?
Certainly! You can change decorations, add sprinkles, or use different flavors of icing if you prefer.
What occasions are best for ghost cookies?
Ghost cookies are ideal for Halloween parties but also work well as fun snacks year-round!
Final Thoughts
These ghost cookies are not only simple to make but also offer plenty of room for creativity. Feel free to customize them with different decorations or flavors. Try making these spooky treats at your next gathering, and enjoy their playful appeal!
Did You Enjoy Making This Recipe? Please rate this recipe with ⭐⭐⭐⭐⭐ or leave a comment.
📖 Recipe Card
Print
Ghost Cookies
- Total Time: 25 minutes
- Yield: Makes approximately 9 ghost cookies 1x
Description
Get ready for Halloween with these delightful ghost cookies! Perfectly spooky and irresistibly tasty, these treats will be the star of your holiday festivities. In just 25 minutes, you can transform chocolate chunk cookies into charming ghost figures using a few simple ingredients. Ideal for kids and adults alike, these cookies make great party favors, dessert table centerpieces, or even a fun family activity. With easy steps to decorate and customize, every batch can be uniquely yours. Whether you’re hosting a Halloween party or simply looking to add a festive touch to your day, these ghost cookies are sure to impress!
Ingredients
- 175g icing sugar
- 1 pack (200g) chocolate chunk cookies
- 9 regular-sized marshmallows
- Black writing icing
Instructions
- Prepare your workspace by laying out all ingredients and tools.
- Spread icing sugar over each chocolate cookie using a spatula.
- Place a marshmallow on top of each iced cookie and press gently.
- Use black writing icing to draw spooky faces on the marshmallows.
- Serve your ghost cookies on a festive platter and enjoy!
- Prep Time: 15 minutes
- Cook Time: 10 minutes
- Category: Dessert
- Method: Baking
- Cuisine: American
Nutrition
- Serving Size: 1 cookie
- Calories: 160
- Sugar: 18g
- Sodium: 60mg
- Fat: 7g
- Saturated Fat: 3g
- Unsaturated Fat: 4g
- Trans Fat: 0g
- Carbohydrates: 24g
- Fiber: 0g
- Protein: 1g
- Cholesterol: 0mg