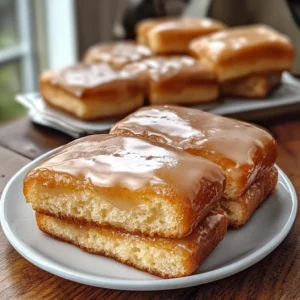
Learn how to make the most delicious Cheesy Egg & Cheese Piroshki Recipe (video). These delightful Ukrainian hand pies are perfect for any occasion, whether as a snack, appetizer, or a hearty meal. Their rich flavors and crispy texture make them irresistible, and you can choose to bake or fry them. Let’s dive into why this recipe is a must-try!

Jump to:
- Why You’ll Love This Recipe
- Tools and Preparation
- Essential Tools and Equipment
- Importance of Each Tool
- Ingredients
- For the Dough
- For the Filling
- For Frying/Baking
- How to Make Cheesy Egg & Cheese Piroshki Recipe (video)
- Step 1: Prepare the Dough
- Step 2: Combine Ingredients
- Step 3: Let It Rise
- Step 4: Prepare the Filling
- Step 5: Assemble the Piroshki
- Step 6: Cook Your Piroshki
- How to Serve Cheesy Egg & Cheese Piroshki Recipe (video)
- As an Appetizer
- For Lunch
- At Family Gatherings
- With Soup
- As a Snack
- How to Perfect Cheesy Egg & Cheese Piroshki Recipe (video)
- Best Side Dishes for Cheesy Egg & Cheese Piroshki Recipe (video)
- Common Mistakes to Avoid
- Refrigerator Storage
- Freezing Cheesy Egg & Cheese Piroshki Recipe (video)
- Reheating Cheesy Egg & Cheese Piroshki Recipe (video)
- Frequently Asked Questions
- Can I bake instead of fry?
- What fillings can I use?
- How do I know when the dough has risen enough?
- Can I make these piroshki ahead of time?
- Final Thoughts
- 📖 Recipe Card
Why You’ll Love This Recipe
- Delicious Flavor: The combination of eggs, farmer’s cheese, and mozzarella creates a rich and satisfying filling.
- Versatile Serving Options: Enjoy them baked for a healthier option or fried for that crispy delight.
- Easy to Make: With clear instructions and simple ingredients, you’ll impress your family and friends without stress.
- Perfect for Any Occasion: Whether it’s a festive gathering or a casual lunch, these piroshki fit right in.
- Appealing Presentation: Their golden-brown exterior and delightful filling make them visually appealing.
Tools and Preparation
Having the right tools makes cooking easier and more enjoyable. Here’s what you’ll need to whip up these tasty piroshki.
Essential Tools and Equipment
- Mixing bowl
- Rolling pin
- Baking sheet
- Frying pan
- Pastry brush
Importance of Each Tool
- Mixing bowl: Essential for combining ingredients thoroughly to create a smooth dough.
- Rolling pin: Helps roll out the dough evenly for perfect piroshki shapes.
- Frying pan: Ideal for achieving that crispy exterior when frying your piroshki.
Ingredients
For the Dough
- 1 cup whole milk
- 2 tsp white sugar
- 1 tbsp dry active yeast
- 1 tsp sea salt
- 1/3 cup butter (melted)
- 1 large egg
- 3 cups all-purpose flour
For the Filling
- 6 large eggs (hard-boiled; diced)
- 1/3 cup mayonnaise
- 1 cup grated mozzarella cheese
- 3 green onions (diced; green parts only)
- 2 tbsp fresh chopped parsley
- 1/4 cup fresh chopped dill
- 1 tsp EACH: dried garlic, dried onion powder
- 2 tsp sea salt
- ground black pepper (to taste)
- 2 1/2 cups farmer’s cheese (tvorog)
For Frying/Baking
- 3 to 5 cups canola oil (for frying)
- 1 large egg (beaten; for baking only)
How to Make Cheesy Egg & Cheese Piroshki Recipe (video)
Step 1: Prepare the Dough
Start by warming the milk until it’s just warm to the touch. In a mixing bowl, combine the warm milk with sugar and yeast. Let it sit until bubbly, about 5 minutes.
Step 2: Combine Ingredients
Add melted butter, salt, and a large egg into the yeast mixture. Gradually add flour until you form a soft dough. Knead on a floured surface until smooth.
Step 3: Let It Rise
Place the dough in an oiled bowl, cover with plastic wrap or a towel, and let it rise in a warm place until doubled in size—about 45 minutes.
Step 4: Prepare the Filling
While the dough rises, mix together diced hard-boiled eggs, mayonnaise, mozzarella cheese, green onions, parsley, dill, garlic powder, onion powder, sea salt, black pepper, and farmer’s cheese in another bowl until well combined.
Step 5: Assemble the Piroshki
Once the dough has risen, punch it down. Divide into equal pieces. Roll each piece into circles about 4 inches across. Place filling in the center and fold over to seal.
Step 6: Cook Your Piroshki
For frying: Heat oil in a frying pan over medium heat. Fry each piroshki until golden brown on both sides. For baking: Preheat oven to 375°F (190°C), place on baking sheet brushed with beaten egg.
Enjoy your delicious homemade Cheesy Egg & Cheese Piroshki!
How to Serve Cheesy Egg & Cheese Piroshki Recipe (video)
These cheesy egg and cheese piroshki are delightful treats that can be enjoyed in various ways. Whether you serve them as appetizers or a main dish, you’ll love how versatile they are!
As an Appetizer
- Serve warm with a side of dipping sauce like sour cream or tangy tomato sauce for extra flavor.
For Lunch
- Pair piroshki with a light salad, such as a cucumber and tomato salad, to balance the richness.
At Family Gatherings
- Present them on a platter with other finger foods, making them perfect for sharing during parties.
With Soup
- Enjoy piroshki alongside a hearty soup, such as borscht or chicken noodle, for a comforting meal.
As a Snack
- They make an excellent snack option any time of day. Just heat them up for a quick bite!

How to Perfect Cheesy Egg & Cheese Piroshki Recipe (video)
Perfecting your cheesy egg and cheese piroshki can elevate your cooking game. Here are some tips to ensure they turn out delicious every time.
- Use fresh ingredients – Fresh herbs and quality cheese enhance the flavor of your filling.
- Don’t rush the dough – Allow the dough to rise fully for fluffy piroshki.
- Experiment with fillings – Feel free to add vegetables or different cheeses to customize your filling.
- Monitor the frying temperature – Keep oil at the right temperature to avoid greasy piroshki; too hot can burn them while too low makes them soggy.
- Brush with egg wash – If baking, brushing with a beaten egg gives them a beautiful golden color.
Best Side Dishes for Cheesy Egg & Cheese Piroshki Recipe (video)
Complement your cheesy egg and cheese piroshki with these delightful side dishes that will enhance your meal.
- Cucumber Salad – A refreshing mix of cucumbers, dill, and yogurt adds crunch and coolness.
- Borscht – This traditional beet soup offers vibrant color and earthy flavors that pair well with piroshki.
- Coleslaw – A tangy coleslaw brings crispness and acidity to balance the richness of the piroshki.
- Potato Wedges – Crispy potato wedges seasoned with herbs are perfect for dipping alongside your piroshki.
- Roasted Vegetables – A medley of roasted seasonal vegetables adds warmth and nutrition to your meal.
- Pickled Vegetables – Tangy pickles provide a contrast that enhances each bite of your cheesy treats.
Common Mistakes to Avoid
When making your Cheesy Egg & Cheese Piroshki Recipe (video), avoid these common pitfalls to ensure delicious results.
- Overworking the dough: This can lead to tough piroshki. Mix just until combined and let the dough rest.
- Ignoring ingredient temperatures: Using cold eggs or milk can affect yeast activation. Ensure they are at room temperature before use.
- Not allowing enough rise time: Rushing the dough’s rise may result in dense piroshki. Let it rise until doubled in size for optimal fluffiness.
- Using low-quality cheese: Poor cheese can ruin flavor. Opt for fresh, good-quality mozzarella and farmer’s cheese for the best taste.
- Frying at too high a temperature: This can cause burning on the outside while leaving the inside raw. Maintain a medium heat for even cooking.
Refrigerator Storage
- Store leftover piroshki in an airtight container.
- They will last up to 3 days in the refrigerator.
Freezing Cheesy Egg & Cheese Piroshki Recipe (video)
- Place cooled piroshki in a single layer on a baking sheet before freezing.
- Once frozen, transfer them to a freezer bag for up to 3 months.
Reheating Cheesy Egg & Cheese Piroshki Recipe (video)
- Oven: Preheat to 350°F (175°C) and heat for about 10-15 minutes until warm.
- Microwave: Heat on medium power for 30-60 seconds, checking frequently to avoid sogginess.
- Stovetop: Warm in a skillet over low heat, flipping occasionally until heated through.
Frequently Asked Questions
Here are some common questions about the Cheesy Egg & Cheese Piroshki Recipe (video).
Can I bake instead of fry?
Yes! For a healthier option, brush with beaten egg and bake at 375°F (190°C) until golden brown.
What fillings can I use?
Feel free to customize with your favorite ingredients, such as spinach or different cheeses, for varied flavors.
How do I know when the dough has risen enough?
The dough should double in size and feel airy. A gentle poke should leave an indent without collapsing.
Can I make these piroshki ahead of time?
Absolutely! Prepare them and freeze before frying or baking. Just reheat when ready to serve.
Final Thoughts
The Cheesy Egg & Cheese Piroshki Recipe (video) offers a delightful blend of flavors and textures that appeals to everyone. These hand pies are perfect as snacks or appetizers and can be customized with various fillings. Don’t hesitate to try this recipe; you’ll love how versatile and satisfying they are!
Did You Enjoy Making This Recipe? Please rate this recipe with ⭐⭐⭐⭐⭐ or leave a comment.
📖 Recipe Card
Print
Cheesy Egg & Cheese Piroshki
- Total Time: 50 minutes
- Yield: Approximately 12 servings 1x
Description
Indulge in the delightful flavors of our Cheesy Egg & Cheese Piroshki Recipe. These Ukrainian hand pies, filled with a creamy blend of farmer’s cheese and eggs, are perfect for any occasion—be it a snack, appetizer, or a hearty meal. With the option to bake or fry, these golden-brown pastries boast a crispy exterior and a rich, savory filling that will have everyone coming back for more. Whether served at family gatherings or enjoyed as a quick lunch, these piroshki are versatile and easy to make. Get ready to impress your friends and family with this irresistible recipe!
Ingredients
- 1 cup whole milk
- 2 tsp white sugar
- 1 tbsp dry active yeast
- 1 tsp sea salt
- 1/3 cup butter (melted)
- 1 large egg
- 3 cups all-purpose flour
- 6 large eggs (hard-boiled; diced)
- 1/3 cup mayonnaise
- 1 cup grated mozzarella cheese
- 3 green onions (diced; green parts only)
- 2 tbsp fresh chopped parsley
- 1/4 cup fresh chopped dill
- 1 tsp EACH: dried garlic, dried onion powder
- 2 tsp sea salt
- ground black pepper (to taste)
- 2 1/2 cups farmer's cheese (tvorog)
- 3 to 5 cups canola oil (for frying)
- 1 large egg (beaten; for baking only)
Instructions
- Warm the milk and combine with sugar and yeast in a mixing bowl. Let it sit until bubbly (about 5 minutes).
- Add melted butter, sea salt, and a large egg to the yeast mixture. Gradually incorporate flour until you form a soft dough.
- Knead the dough on a floured surface until smooth, then let it rise in an oiled bowl covered with plastic wrap until doubled in size (45 minutes).
- In another bowl, mix diced hard-boiled eggs, mayonnaise, mozzarella cheese, green onions, parsley, dill, garlic powder, onion powder, sea salt, black pepper, and farmer's cheese.
- After the dough has risen, punch it down and divide into equal pieces. Roll each piece into 4-inch circles and place filling in the center before sealing.
- For frying: Heat oil in a pan over medium heat and fry piroshki until golden brown on both sides. For baking: Preheat oven to 375°F (190°C) and place on a baking sheet brushed with beaten egg.
- Prep Time: 20 minutes
- Cook Time: 30 minutes
- Category: Snack/Appetizer
- Method: Baking/Frying
- Cuisine: Ukrainian
Nutrition
- Serving Size: 1 piroshki (78g)
- Calories: 210
- Sugar: 2g
- Sodium: 320mg
- Fat: 10g
- Saturated Fat: 4g
- Unsaturated Fat: 5g
- Trans Fat: 0g
- Carbohydrates: 24g
- Fiber: 1g
- Protein: 7g
- Cholesterol: 80mg